Monday, December 28, 2020


USING GIT HUB

We were taught and instructed on how to use Github to bring our individual contributions to the game in a more simple and resolved way.

Initially I used the github website before downloading github desktop, I could see what everyone has added as the screen shot reveals.

Also I added my own assets that I created then formed them as png's. Unfortunately my unity app eventually stopped corresponding with my github there was an internal issue that began in my laptop which made unity stop working efficiently and opening.

So I was unable to add these assets myself, but I sent them to my team members and told them about my situation.

For the 'game won screen'


Below are some previews of the growth of the game, with screenshots of the first two levels,


These are brief examples of how the game looked halfway, 

 initial then final designs of background

This is the first design I initially created using illustrator, I made this for the forest level, so I made sure to add a background filled with mountains and lots of vegetation. Additionally, I added more tree details in the second design below as I thought it would make the scene look more like a literal forest.


https://youtu.be/94MXcvc6khM


I then decided I wanted to make the scene to appear more clean  , neat inspired by the image I saw above on YouTube. whilst having all the same elements as the above designs.
I created another design but with different tones and better use of space.
Then afterwards I thought to adapt the scene to accommodate the village, I used simple shapes to represent houses and I decided not to use too much detail to cause less visual disturbance as this is just the background.


-Making our game and planning

With creating our official game we decided to work together in one large group, 

then we started to compile our ideas together.

We looked at 2d and 3d games including, Rayman, Assasins Creed, Donkey Kong and a few other fantasy games.

From these games we decided that we should have a game with a simple amount of levels, with the genre based on fantasy.

spider diagram


Shrek. 2001. [film] Directed by V. Jenson and A. Anderson. Universal Pictures.

We then created a spider diagram, that had details of the type of characters we wanted , originally some agreed on having a hybrid main character that is half ogre half elf, or half vampire. We looked briefly at Shrek and the types of weapons used by ogres.

Eventually, more people sided with the idea of the character being a vampire only as it was more simple and rational.

We then made a list of locations and weapons, for the location we decided to have a village a dungeon/salt mine and a forest. Additionally most importantly we had to create the story for the vampire. 

This is when we came up with ideas such as having blood bags to power up the vampire as it travels through the levels and having garlic guns or salt guns as disadvantages to the vampire.


We later divided our roles, and I chose to be partly in charge of the background art and other graphics.

   The other roles included, level designs which Sophie and Albert were in charge of,

   The coding was also with Sophie, Albert and also Jennifer,

   The 3D character modelling responsibility was Sean Gabi and Yifan 

   and Karen and Gabi were in charge of 2d concepts


Wednesday, November 25, 2020


Unity - Manual: Joints (unity3d.com)

This week we looked at different types of joints, some of them are displayed above.
Afterwards, we applied these joints onto objects on unity.


Below shows me using the fixed and spring joint
The fixed joint helped more with keeping some joints still whilst the spring


Sunday, November 15, 2020

 Team work practices 3 (ACE initial brief)

In this meeting we discussed our task and we may be mostly assessed on.

- The task will be given to all of us at the same time or downloaded at the same time.

-Most of the key attributes the assessors will look for are:

Analysis skills

Problem solving skills

Teamwork

Whilst we are completing the task it is very important for everyone contributing to clarify their roles and what they are doing, also its ideal for everyone to reach an agreement on the given plan.

The assessors can also mark what they can see and hear so communication is very important, but ideas should be brought about in a positive but challenging way rather than being heavily argumentative.

It is very crucial to have a good beginning and ending as those are the most memorable moments generally.

Have a subject matter which will need to be summarised before presenting in-groups Teamwork Free content, s Of Team Work, text, team, presentation png |  PNGWing

 Team work practice (2)

Three Teamwork Trends That May Not Survive This Crisis | INSEAD Knowledge

Creator: RLT_Images |

In our first unity workshop, we learnt a few basics and controls to make a 3D game, below are a few controls I learnt:

-Right click plus move mouse = moving around a scene

-Click any object plus (alt)key plus rotating mouse = seeing all dimensions of the object without the scene moving too much

-Click object plus (W) key= ability to drag objects up and down

-Click object plus (E)key= rotating feature

These instructions helped me to create and organise the positioning of 3D shapes onto my platform, I was also able to resize them to my standards.

Teamwork practices (1)

- From our initial meeting we were given a brief overview of what is to come during this module, also what our responsibilities may vaguely look like.

-Overall this module the main objective is to oversea how me and the rest of my course mates workweek together in teams.

-We will also be placed into work environments to deeply asses how we perform naturally in the roles, and eventually we will learn more about ourselves and how we work with other people.


Part of what we will be doing will include producing a video game together on the unity software, each of us will have to make personal contributions to the project, this may come in the form of: sketches, story plot lines , perhaps coding and many other things to help the team.

-We intent to have weekly unity workshops where we will learn how to build up our games and learn the basic skills.


Friday, May 15, 2020


WORKING ON UNITY 

I got this background from the games store by searching 'game asset'
I learnt that when you import a sprite you have to import it into 2D as it may be textured wen you receive it.

Another import aspect was to have 150 pixels per unit, and it was a 2D game so it would not work with 2D axis

UNITY
SECOND VIDEO

This was my 'chance meeting video'
I included the 2 metre rule and its impact with personal space.

I used my brother and buzz lightyear and two characters from an animation I made.

The plant I used was to signify the park aesthetic and those who have used this time to do their daily exercise outdoors.

Video project

These are the composition settings I used for my cup of tea video, I used a sample rate of 48000HZ,1920/1080 and quicktime and a frame rate of 25. In the video itself I filmed the steps of making the tea including adding the tea bag and sugar and water, whilst emending videos of things happening in fast motion to emphasise the process.

videos used - https://www.youtube.com/watch?v=zsJpUCWfyPE&t=222s

https://www.youtube.com/watch?v=_ZqlxuUzVIU&t=112s


Health and safety whilst using Arduinos

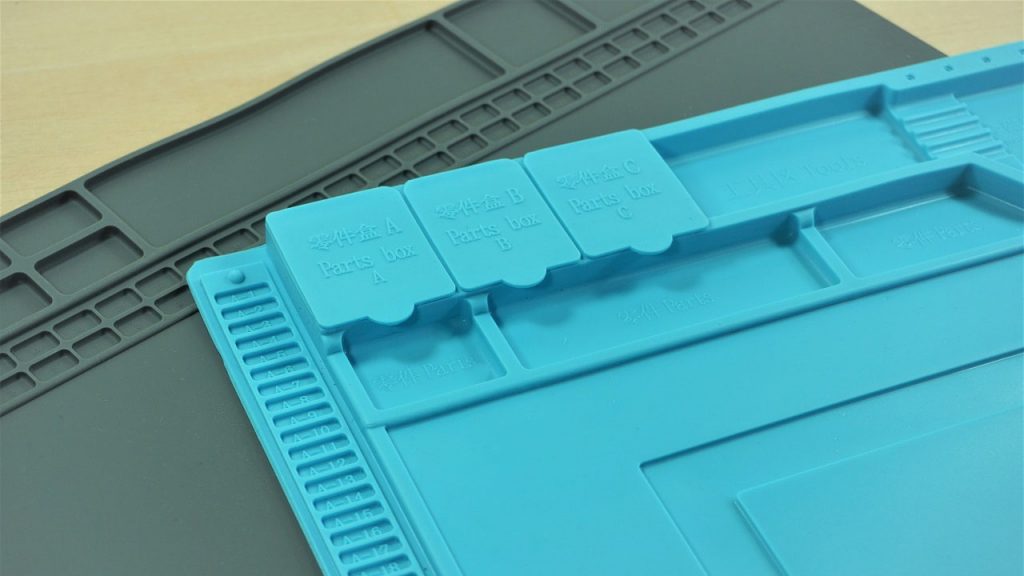
-Whilst using an Arduino you can use soldering mats which act as thermal resistors to heat

Protect Your Workbench - Soldering Mats Review - Maker Advisor

-Before you start make sure the Arduino is not connected to a power source e.g a computer
therefore there is a low chance of sending electrons to unwanted areas

-Transformers can be used instead of batteries
-Anti static mats can be used so there is no direct contact with your body
-

Thursday, March 12, 2020

Arduino project

- I worked alongside one other person to create an interactive system with Arduino. Additionally, at first I had wanted to work with led lights again but then we eventually agreed on working to create a motor. We initially tried to use motor codes from online to with a circuit we found online.
Overall this circuit did not work and the motor was not powered. Furthermore, one of the reasons things did not work out is due to there not being a connection to the positive strips of the breadboard and we were using the wrong resistors. 


Eventually, we adapted our circuit, connecting the first two wires to the 5voltage and the ground, whilst adding additional wires to the positive and negative strips of the breadboard. I learnt that power is vertical in the breadboard line. With this knowledge we aligned the motor and variable resistor in the lines parallel to the wires above. We were able to power the motor successfully using the Arduino software more as a power tool for the circuit board so we did not actually end up using a code. This was a form of creative cheating.
. In conclusion, through this experimentation we were giving power to the motor and attempting to vary its resistance which helped to dictate its speed. To improve, we could use a touch sensitive resistor or vary the speed in a more particular way to create more interesting movement.


Tuesday, March 10, 2020

Arduino  Introduction

For our next project we are going to be working with arduinos; they are devices that make electronics more accessible to designers , artists and hobbyists.

Micro-controllers are involved which include a circuit board and a chip that are programmed to do many things.

The topic of Arduino's arises the discussion of interactivity, this can be described as a two step process with information transferred and given through sensors. Other keywords include: Latency and Interface.

In an Arduino there is a two way flow of information, the conventional method is to plug a usb connecting an Arduino to a computer, which is a shortcut way of processing.

THE ANATOMY OF AN ARDUINO
using the image above I will locate the different points.
-Area 2 is the usb port area used for sending data and power.
-Area 6 is where you can insert pins ,variable resistors and sensors.
-Area 5,4 and 3 is where power can be sent and received
-Area 7,8 is where light display can be impacted
Other resistors used are thermostats and LDR, and breadboards are used alongside an Arduino.


The role of a resistor is to protect the circuit and control the voltage so too much power is not sent out.
CONNECTING THE ARDUINO ONTO OUR COMPUTER
-To do this we set up the circuit on the Arduino and the breadboard, then we opened up a software on our computer called 'Arduino' then clicked 'basics' then 'blink'.
-There was a comment section but this is mainly for giving users like ourselves information without affecting the code.
-connect the Arduino using the usb
using the code showed when you clicked on 'basics' and 'blink' you should now click on verify which shows if there are any errors.
-The errors for example could be 'no Arduino connected'.
-If everything is connected then things should start running.

Processing


Through using the processing website https://processing.org/examples/ for the app "Processing 3.5-5";we went through various examples of codes used to create many patterns and even drawings.

The first picture above shows one of the codes that makes balls appear on the screen then bounce and disappear. I attempted to change the screen time from 255 to 350, then the gravity from 0.5 to 0.8. However, this made the balls bounce less and although they did have a longer screen time.

The second image displays a processing code that allowed me to sketch, although there were no undo or delete functions and only one colour was able to be used.

Processing is used as a template whilst the Arduino is used as an interface.

interface definition : Where two objects or systems meet and interact.


Friday, March 6, 2020

Mocha AE Planer tracking.


to activate the Mocha effect, I had to go to effects then through Boris selection I followed an arrow leading to mocha-and I double clicked on the logo which appeared to activate it,

I then made a red rectangle to track and stabilize the phone, then the blue inner rectangle to locate where I want to insert my image. I clicked the light blue buttons on the left side as well before saving my work.

To insert the image I had to click on- create track data then choose the option to add a layer.

Afterwards, layer export to {your image}

eventually my image was inserted into the clip.
Making my own tracked videoI made a video filming a hallway, where I then imported the poster into my composition.
I then added a 3D tracker and made a detailed analysis as the video was complex.

However because the video had a lot of white walls the contrast and brightness impacted the tracking making it glitch a lot.

As a result I used mocha to help stabilize the poster in a single  position by surround a red rectangle around where I wanted the poster to be placed.

After the tracking on mocha was complete the video was 95% stable there was still a frame that glitched, so the best solution was to remove that single frame.

Finally, the poster was stable and I adjusted the, saturation, brightness and I added a blur filter so it blended into the background.
Working with 3D layers

Using this video made by a drone we learnt how to add various effects, including decay and fire.

Firstly we had to add the clip into the main composition, after wards I had to click on the anchor tool(besides the camera in the tool section) to drag the anchor in the clip downwards.

We then inserted a ground decay object but we had to make it blend into the clip. To do this we had to render its track points in effects control, after that many small colourful symbols appeared .

The next step was to pick one of them and right click them to create a null, then rotate the z axis to make it lay flat on the earth then blend it by playing around with the saturation and hue's.


 To change the drone set up to a more suitable frame, we had to change the composition settings to 1280/720 frame and in the effects settings we had to use 'optics compensation.


Point tracking 05/03/20
These are the initial steps I wrote for beginning how to point track.
After those steps I also learnt that I had to make a null and then make sure it follows the tracker formed.
Eventually, bring in a 3D object making sure it follows the null- this is made possible by using the parent pull whip tool.
I had to create a moving plane, I first inserted the plane alone which was a stabilized clip.
I then added two track motions on either sides, afterwards I clicked on the position, rotation and scale settings before adding analyse and transform to the track type.
I went back to my composition and added a null object.
I inserted the missile's although they overlaid the plane so I added a filter which illuminated the plane and duplicated the plane as well so the missiles appear below them.


Through this project one of the main things I learnt was that in order to activate track motion you have to insert a clip, as images do not work.
1-You can either create stills in photoshop of layered images and then export them to after effects.
2-You could stabilize a video in premier then export it into after effects.
3-You could stabilize a video in a single composition within after effects then insert the product into the second composition.

Making my own video using the camera -AFTER EFFECTS

- Tuesday

We had to create a video using the camera on after effects including texts and images.
I added different layers of texts all including different statements and then a few pictures which I edited on photoshop.

I was able to use the tips I learnt from learning how to use cameras, including making the text and objects 3D, combining layers with the parent whip chain, and playing around with the various axis.

Tuesday, March 3, 2020

After effects-working with Cameras

We extracted this file including different shapes and graph paper.
Upon opening the document, I added made all the objects 3d and then I camera and made it have a focal length of 25mm.

By changing the positioning of the camera I was able to rotate the objects ; and eventually I started my animation by changing the positioning of the camera between  1 and 5 seconds. I rotated the screen during the time with the camera effect and added an ease in and ease out animation.

 These are some notes I made whilst learning the controls.